The VIP label lets you flag your most important payees so your team can spot them at a glance — in the Payees list, on inspection queues in Revelator.
What does the VIP label actually do?
VIP is a label, not a feature. Marking a payee as VIP doesn't change any of their permissions, payments, or statements — it's purely visual, so you and your team can quickly recognize your top-priority accounts wherever they appear. Only you and your team members can see the VIP status; payees never see it on their end.
Where to find it
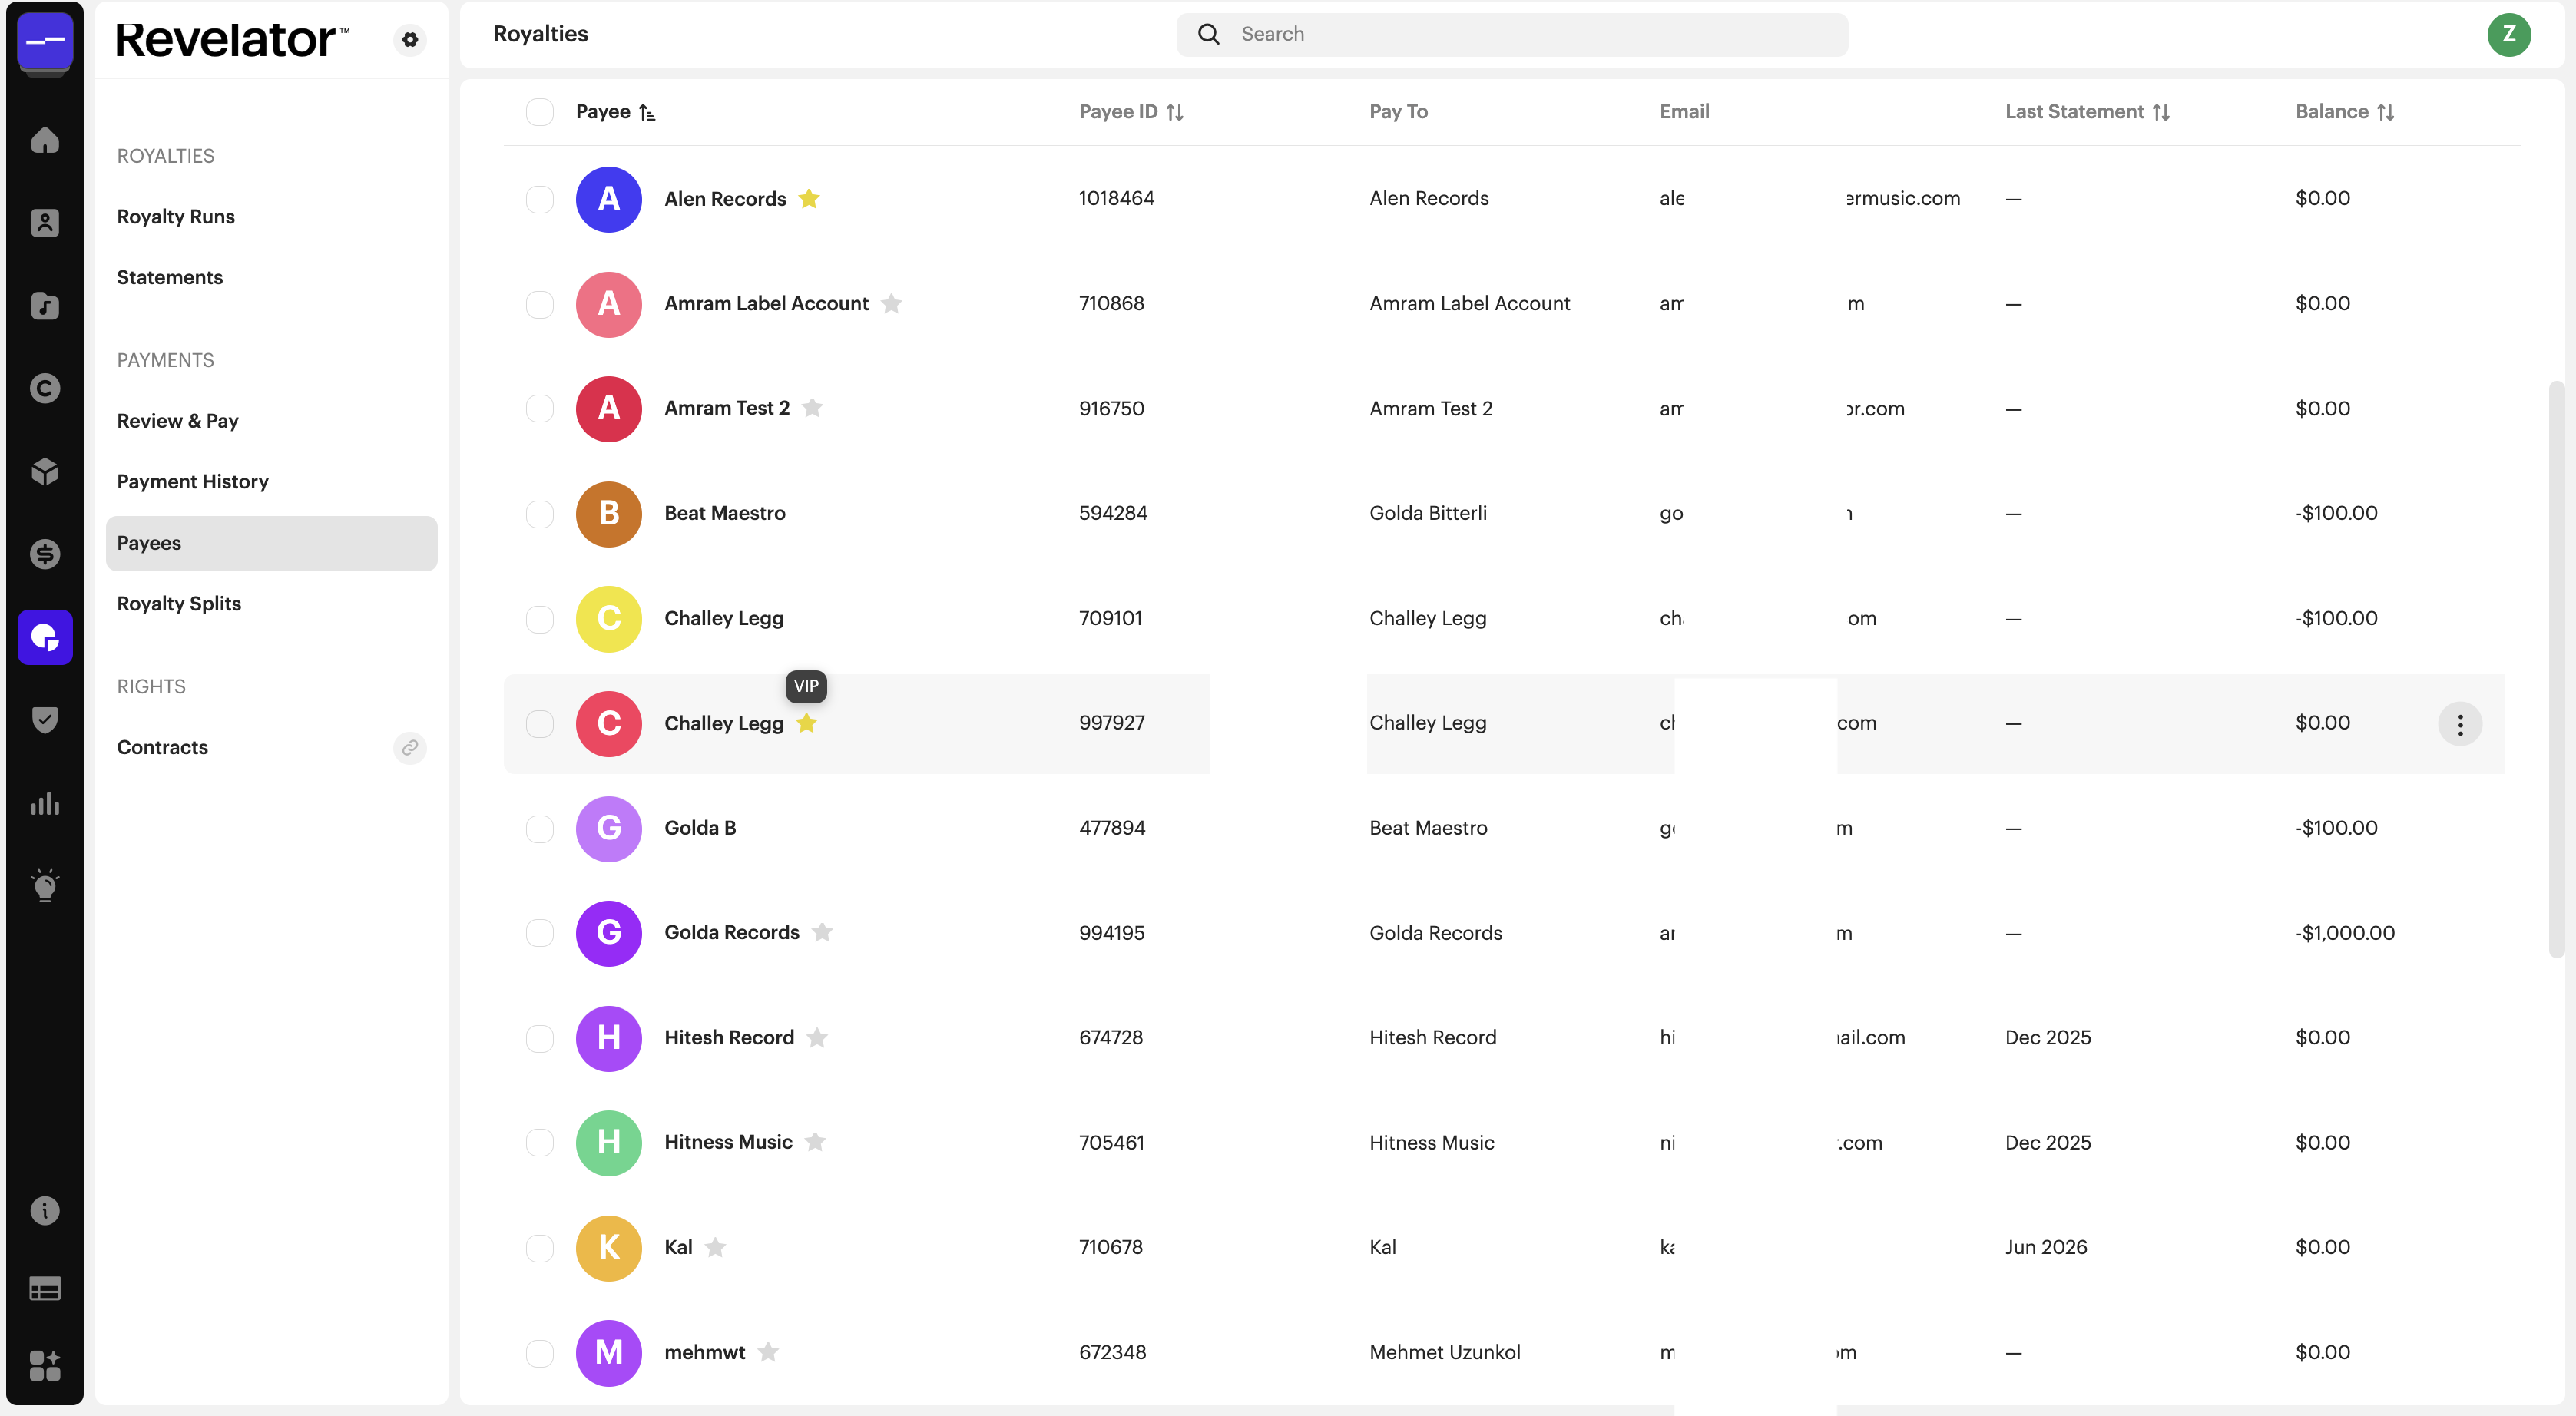
You'll find the VIP star icon anywhere payees are listed, starting with the main Payees list:
- Go to Royalties → Payees.
- Look for the star icon next to each payee's name.
How to mark a payee as VIP
- From the Payees list, find the payee you want to flag.
- Click the star icon next to their name.
A filled gold star means the payee is marked VIP. An empty (outline) star means they're on Standard status. Click the star again anytime to switch a payee back to Standard.
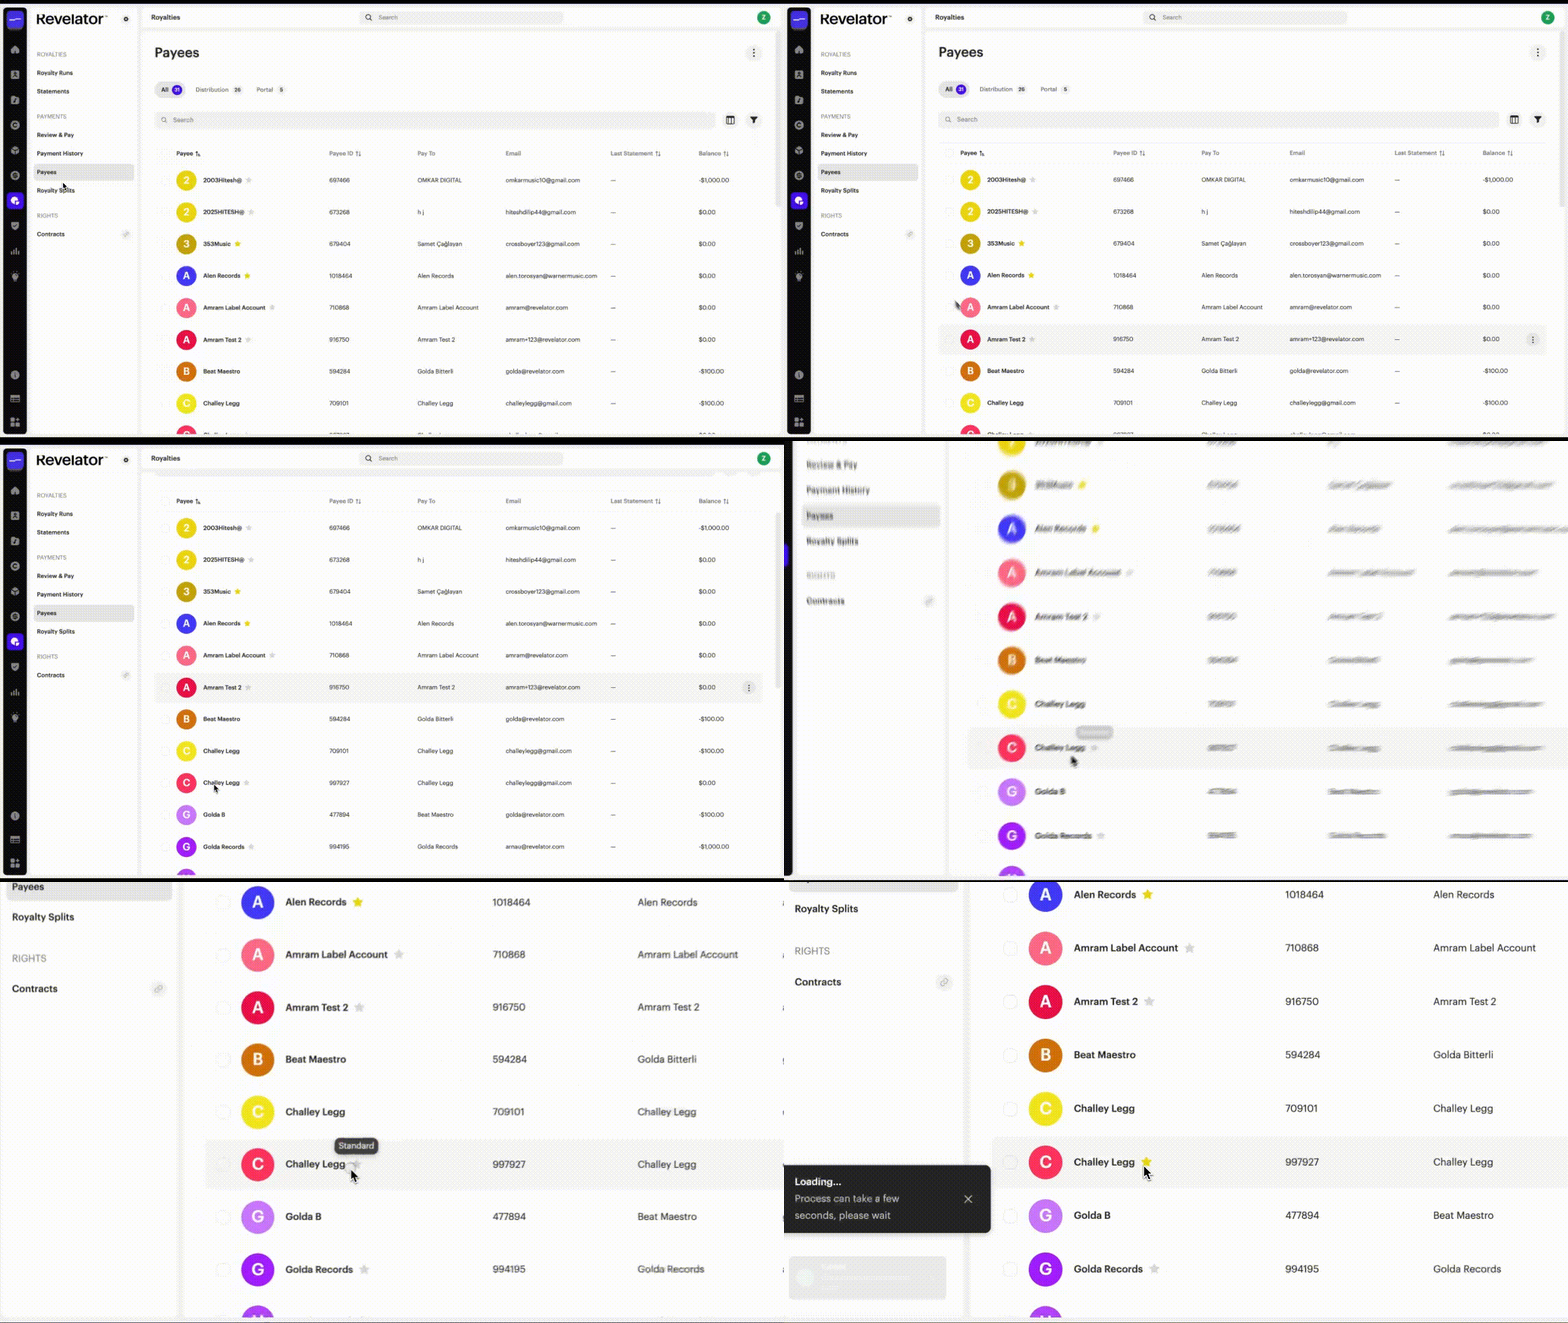
| Tip Revelator Pro confirms the change with a "Client priority status switched to VIP" (or "to Standard") notification, so you always know it worked. |
How to filter for VIP items
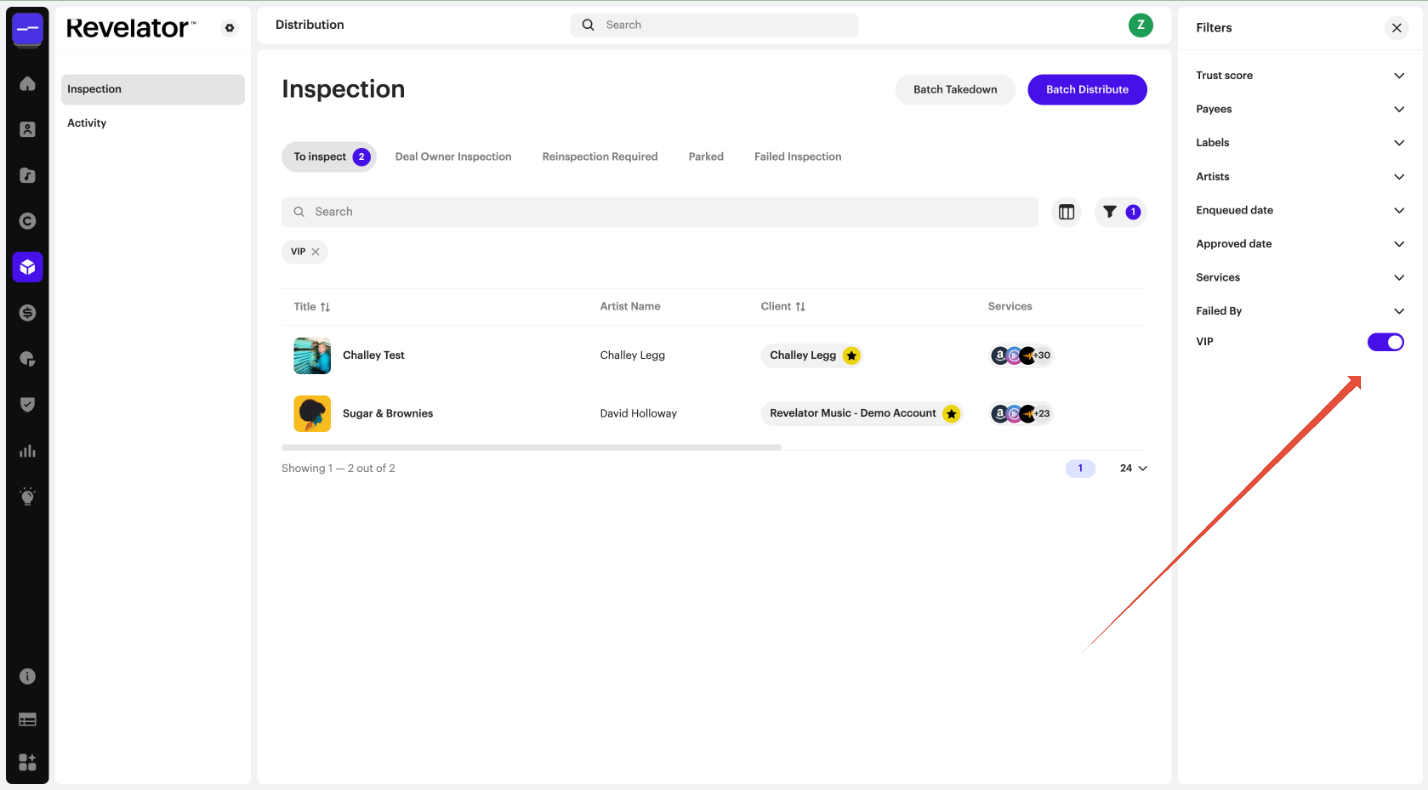
Once a payee is marked VIP, you can filter for their content elsewhere in Revelator Pro. For example, on the Distribution → Inspection screen:
- Open the Filters panel using the funnel icon at the top right of the list.
- Scroll down to the VIP toggle near the bottom of the filter list.
- Switch it on.
The list narrows to only the items tied to your VIP payees, and a VIP chip appears below the search bar to show the filter is active. Wherever a VIP client appears in the results, you'll also see a small gold star badge next to their name — hover over it to see the "VIP" tooltip.
Related articles
Was this article helpful?
That’s Great!
Thank you for your feedback
Sorry! We couldn't be helpful
Thank you for your feedback
Feedback sent
We appreciate your effort and will try to fix the article